

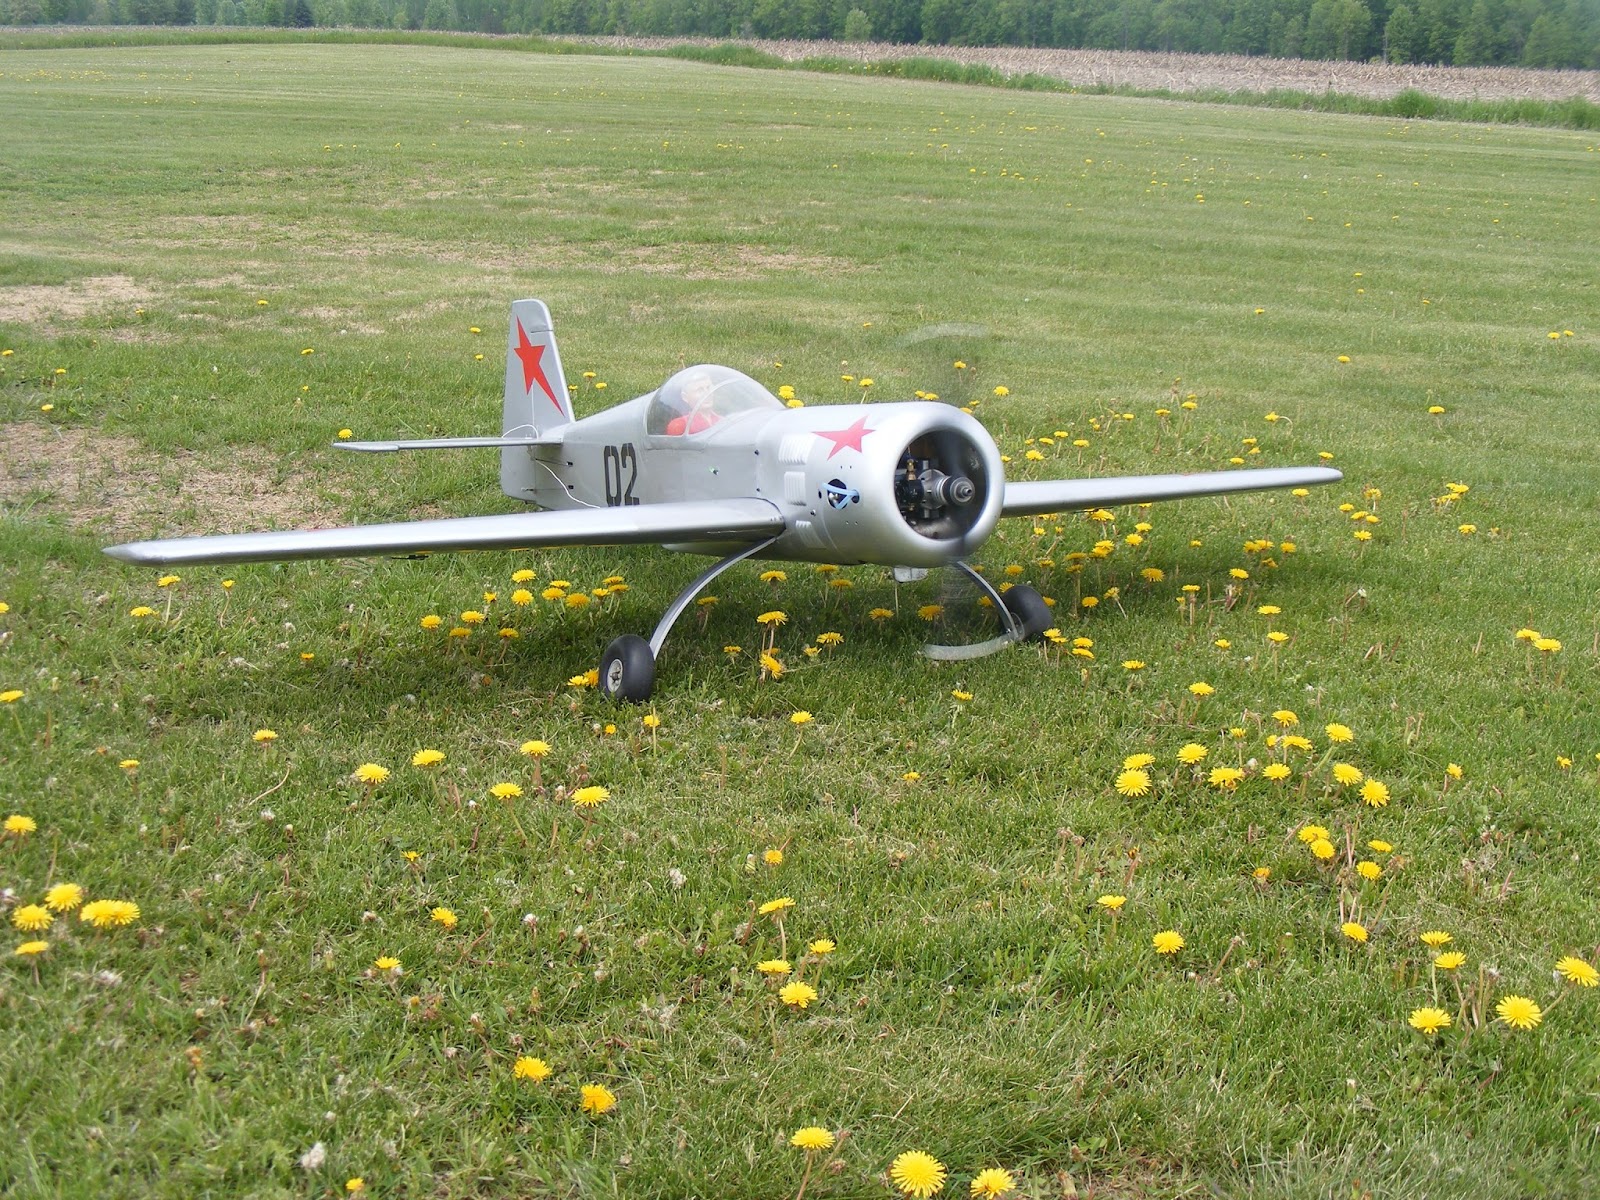
This model was originally fitted with an Enya 120 4 Cycle engine but has now been fitted with an Irvine 120 2 Cycle because the Enya is now seeing service in a 120 size Japanese Zero


Power 120 (20 cc) Irvine 2 cycle Nitro
Dry Weight 9.3 pounds (4.22 kg)
Model Designed by Dave Patrick Past VP of Carl Goldberg Models. I picked up this kit over 20 years ago when Dave Patrick came to our town on a promotional tour and demonstrated his new design at the local flying field. Dave wowed all present with his aerobatic skills flying his prototype Sukhoi. We witnessed Dave's SU-26 model perform the lomcevak tumble maneuver the first and only time I saw this performed by an RC model: very impressive but for the life of me; I could not visualize what I was witnessing.
According to Wikipedia:
Description [edit]
The Lomcovak is a freestyle family of maneuvers performed at airshows or in four minute frees. It is not in the Aresti catalogue and therefore may not be flown in competition.
The maneuver consists of tumbling the airplane through the pitch axis (end to end) while it travels in a lateral direction (wingtip to wingtip).[1]
Flying technique [edit]
Flying a Lomcovak (Lomcevak) will vary in technique from aeroplane to aeroplane and pilot to pilot. This is probably the most common technique described for a clockwise rotating engine.
- Pitch up to the 45, simultaneously roll to the left with aileron and kick in full left rudder, then shove the stick full forward. The aeroplane should do about two full rotations before running out of energy. Neutralise all controls and the aircraft will recover with the nose down. Fly out of it and correct accordingly. It may be necessary to reduce the power when recovering in certain instances.
Where is Dave Patrick today?
lRCAP 001: INTERVIEW WITH DAVE PATRICK Published January 10, 2010 | By Al Tejera We start off our first show interviewing Dave Patrick of Dave Patrick Models and former VP of Carl Goldberg Models. Dave was a long time TOC competitor and also has many team Scale championships to his credit. Dave discusses what he is doing these days and tells us how to set up throws on a new and unknown aerobatic model. He then discusses how he test flies and trims a new design to find the optimum CG. Dave also tells us why scale aerobatic models are deviated from full size aircrafts. Dave shares his list of ”must have” mixes for precision aerobatics. We also discuss at what point more power is not always better and the secret to consistent wins in aerobatics competitions. He also share how to set up throws for optimum aerobatics competition. CALL IN QUESTION: Fred Buchholtz of Safety Harbor, FL asks Dave if he uses a mantra to learn maneuvers with many stick inputs. SHOW SPONSOR: TME – Tejera Microsystems Engineering Inc. is offering free “Secret Smoke Success Tips” Click play button below to play here…
Notes on Carl Goldberg Sukhoi Construction
Below is a reprint of a page from the internet. I would agree with all of these comments because I have had similar experiences and was forced to make the same type of modifications in order to keep it flying; I even developed a couple of my own, which include mounting the landing gear and engine mount with rubber encased well nuts which will pull out in a bad landing without causing an damage to the internal structure.
Reprint article:
I thought maybe someone might benefit from my experiences of building the Carl Goldberg Sukhoi 26. I have built one and I am currently working on my second. Thus, I feel I can make some general comments about the kit. A few others have posted on the rec.models.air group, and I agree with just about everything they said. Use the Deja.com archive to find the posts. Despite the complications below, I really love the flight characteristics of this plane.
For perspective about my building prowess: I am by no means a prolific builder. I manage to build 1/2 to 1 kit a year. I will also be honest and indicate a number of mistakes I made that others might be more clever and avoid.
The Sukhoi should not be a first or maybe even a second plane. It is designed for advanced aerobatics and as such is not forgiving.
In general, I found the kit to be fairly easy to put together. The fuselage was especially easy, with a key and lock type construction. The quality of the materials was uniform and of good grade (except the spars in both kits). The plans were somewhat more trustworthy than the manual in cases of confusion. My version of the kit, circa December 1993, also included three errata sheets. I suggest marking the changes in the manual. Twice I forgot about the sheets, and spent far to much time trying to figure out what was going on. I use a variety of glues when I build: CA, six and ten minute epoxy and weldbond. Most people have there own favorites, and so I will not indicate any specific glue. However, I do not recommend the use of CA on the lite-ply pieces. If you must use it make sure its the thick CA. Thin CA will just soak right into the lite-ply and not bond.
Problems and changes:
I found that a number of the ribs were not cut properly to fit the spars. This becomes a real pain when gluing the leading edge sheeting on. In both kits, the birch spars could have been straighter. Make sure to use plenty of weight to keep the wing flat on the building board.
The sheeting for the aileron servos were too flimsy for my taste, so I added some additional support braces for the sheeting.
The landing gear mount is the biggest problem with this kit. Even the best landing I ever made with this plane left the landing gear well behind the plane. Admittedly, one problem is that I fly from a grass area, but I am not alone in this problem. With the very large moment arm of the landing gear, the small plate to which the gear is mounted in the wing just doesn't have enough area and gluing surface to compensate for any torque on the gear. My understanding is that later kits did beef up the area a little more. However, people I know still were having problems.
My fix is to use a large 1/4" liteply plate that extends from the spar to the leading edge, and as the original plate across to the doubled ribs; this is roughly 4.5"x7.4". In addition, drill the gear to accept 1/4x20 nylon bolts and mount to the new liteply plate with "T" nuts (see drawing below). Now when the landing is too hard the bolts shear.

All screw holes for the servos were beefed up by epoxying a second small piece of lite-ply to the backside of the original lite-ply servo trays where the mounting screws. I did this to both the main tray and the aileron trays.
The cowling definitely needs to be reinforced to improve strength: On my first Sukhoi I glassed the inside of the cowling with 2 oz. fiberglass cloth and epoxy. A second layer of cloth was added to the screw holes. I left the belly pan alone except for the screw holes. The really smart thing to do is to just buy the fiberglass cowl. I had to do this anyway for my first Sukhoi after the gear stripped off and broke the cowling. (The second Sukhoi I bought from someone who had already purchased a fiberglass cowl.) I understand the recent kits include a fiberglass cowl.
I found that my engine overheated and I had to cut a rectangular piece out of the cowl just over and behind the cylinder head. This helped the overheating, but it was not enough; I also had to cover the right side (when facing front of plane) of the front cowl opening with a 1/8" lite-ply baffle.
The top cowl lite-ply former seemed very flimsy. I put a triangular piece of lite-ply behind and at right angles to it for reinforcement.
I added a triangular piece of lite-ply to the sides of each of the three forward screw mounts for the cowl. I managed to break the top one off even while fitting the cowl, and I figured it wasn't going to get any easier at the field. On the second Sukhoi I used right angle metal brackets that are used for supporting adjustable shelves in furniture. These were drilled and tapped to fit the small 4-40 screws that hold down the cowling. These have a 1/4" dia. round stub to fit in holes in the side of the shelf unit. I partially flattened the round part of the nub. In theory, This should help prevent them coming lose.
The lower part of the cowl former needs to be extensively cut down and reshaped at the bottom. The cowl itself tapers toward the rear and it changes from a round to square shape. A lot of bending out of shape is needed to get it around the cowl support pieces even with these modifications.
Be careful when cutting out the canopy. You have to trim it at non obvious places. On my first Sukhoi I trimmed it at the logical place. I thought I was the only one, until I talked with another person who had just completed a Sukhoi, and did exactly the same thing I did. If its too late and you have already grabbed for your Dremel tool, before reading the plans you can do what I did: Place some properly shaped balsa mounts inside the cockpit and then cut and shape pieces of scrap obechi wood from the turtle deck to build up the sides.
I substituted Sig Easy Hinges for all the plastic point hinges. This is my preference. I find the Easy Hinges easier to work with.
I used the engine mount supplied with the kit, but drilled and tapped the mounting holes. I also use lock nuts as a precaution. There was indeed a lot of vibration on the plane.
For the rudder servo I replaced the plastic sleeve bearing of a regular servo with a ball bearing conversion kit. Several people suggested doing this because the push-pull arrangement of the rudder puts a lot of force on the bearing. I also bought a spring steel leaf tail gear assembly (CB associates). This is certainly heavier than the wire gear CG supplies, but it looks great.
 Another big problem! The lite-ply servo tray supplied with the kit is badly designed unless you feel you can do without two servos as long as the plane lasts. The rearmost servo mounting screws for the rudder and elevator servos cannot be accessed once the servo tray is installed. To get around this, I modified the tray mounting to make it removable. Two pieces of hardwood were epoxied to the rear angled former to firmly sandwich the tray at the back. ( I use walnut, because I had some strip scraps available.) The front end of the servo tray was screwed down to another hardwood piece mounted at the front. By removing the screws the entire servo mount can be removed. I was worried about flexing so I also added a thin piece of 1/8" ply lengthwise along the edge of the servo tray for additional strength. (see image)
I also strongly suggest that you modify the belly pan and attach it directly to the wing, not the fuselage. If you don't, the first hard landing will rip the gear off and destroy the belly pan. The reason is that the belly pan is mounted over the wing and landing gear and attaches to the fuselage. When the gear pulls out from a hard landing it tries to take the belly pan with it. Since the pan is mounted to the fuselage and is relatively weak it gets mangled. My pan was unrepairable after the second hard "landing". I left it off without any adverse flying characteristics other than aesthetics. On my second Sukhoi I did just as I suggested. I cut the belly pan into two pieces. The front piece is approximately 1/2 the pan and stradles the landing gear. To each  section I glued 1/8" lite ply formers to the ends of the pan section. I then used the instant Great Stuf foam insulation found in hardware stores to fill the sections. I do not recommend this approach though. The problem is that the foam does not cure evenly. Stuff in the middle did not cure as fast as the edges, and the result was some distortion of the pan sections. The best idea would be to get the polyurethane foam mix that comes as two separate liquids in cans. When mixed in equal portions they generate a foam that seems to cure evenly. Where to get this stuff nowadays is a problem. Sig used to sell it, but no more. I have heard that art supply stores might sell it, or maybe boat shops. Apparently, it used to be used my model railroaders. Barring finding it, I guess I would just add another former or so inside somewhere.
section I glued 1/8" lite ply formers to the ends of the pan section. I then used the instant Great Stuf foam insulation found in hardware stores to fill the sections. I do not recommend this approach though. The problem is that the foam does not cure evenly. Stuff in the middle did not cure as fast as the edges, and the result was some distortion of the pan sections. The best idea would be to get the polyurethane foam mix that comes as two separate liquids in cans. When mixed in equal portions they generate a foam that seems to cure evenly. Where to get this stuff nowadays is a problem. Sig used to sell it, but no more. I have heard that art supply stores might sell it, or maybe boat shops. Apparently, it used to be used my model railroaders. Barring finding it, I guess I would just add another former or so inside somewhere.
In my case, I then proceeded to remove the foam insulation from much of from the interor to save weight. What I was really after was a rigid structure, and a stable place to mount the hold down screws. I then drilled and screwed the belly pan pieces directly to hardwood blocks I glued to the wing. On the front pan piece, I drilled large holes in the front former for air flow through the cowling, and on the rear piece I drilled two large holes on the face to access the wing holddown bolts.
With my Enya 120, in both kits I found I had to add about 8 ounces of lead to the nose of my plane to obtain the proper center of gravity. I suspect the main reason is the heavier tail gear assembly I used. Even with these additions, the total weight is around nine pounds.
Stub longerons were introduced at areas of extreme section change in the fuselage such as at the end of the wing cutout where cracks will develop from loads due to bad landings. Another weak point is the joint between the firewall and the forward fuselage; I found that straps of pipe strapping will go a long way in rectifying this problem.


Flying...
I rate my flying ability as average. A plane now usually lasts for 100-300 flights before something major happens to it. I believe I have enough experience to know a good model from a bad one. In my estimation the Enya 120 engine I use is not enough power for this plane. Vertical performance is just not there. I was running a 16x6 prop at about 8500 rpm. The rpm is a little low probably because I was using only 10% four cycle fuel. As I remarked above, I did have trouble with the engine running hot. So hot that I could not touch the prop nut without getting burned after even a short flight. Hence the mods described above to the cowl. Despite the medicore vertical performance, the engine does have enough power to pull the Sukhoi into the air with ease. Typically, the plane will come off its tail on takeoff, and is airborne within 50 or 60 feet. Only a small amount of up elevator is needed to come smoothly off the ground.
The plane is very stable in the air. I started with the control surfaces about half the maximum recommended. On my third flight I switched to maximum recommended aileron and rudder throws. the plane was still easy to control. Only a slight amount of down elevator is needed in aileron rolls. I left the elevator at about 1/2. I found that these throws gave me fairly scale like performance, without level flight jitters from overcontrol with my non exponential radio. With the rudder set at the recommended maximum setting, I cannot hold a horizontal knife edge at full throttle. On my second Sukhoi I am using a Hitec computer radio with programmable exponential throws. This helps a lot with the jitter problem.
When the throttle is cut the plane drops faster than I am used too, but stalls at an amazingly low speed. This is more remarkable considering my first Sukhoi had a three degree twist in the wing. (Fortunately, my second Sukhoi is within 1/4 deg. I still can't understand how the first one got that way!)
Extra info: Dave Patrick (formerly of Carl Goldberg Models) and a TOC invitee sporadically practiced at our club field (very impressive world class flyer). Quite a while ago when I was building my first Sukhoi he brought the original Sukhoi 26 that was featured in magazine advertisements as a demonstration.
I was elated to find that the test model was almost completely stock, using the kit parts. Another good sign: He flew this model quite often.(A YS 120 was in it.) Several people at the meeting had seen him fly it, and said they were impressed with its performance.
His landing gear really was the only non-stock item I could see. He used a carbon fiber landing gear that someone had given him. He said it shaved 5 oz. off the standard aluminum gear.
Unlike the plans, he was using what looked like 2 1/2" wheels. Probably more scale-like. All the control surfaces were mounted as indicated in the kit. Nothing special.
The cowling was the standard issue, but with the inside glassed with 4 oz. cloth. The forward mounts where either a heavy duty plastic angle bracket with a rib on one side for strength, or made of liteply with a side piece. He said he had about 70 flights on the cowling, and it was showing stress cracks near the mounting points. (I didn't see them.)
The belly pan was not glassed except at the mounting points.
I just completed the first flight of this resurrected re-engined SU-26 with the Irvine 120 and a 16 X 8 Master-Airscrew. My impression of the first flight is that the model flew as well as usual but the top speed is a little low; perhaps a higher pitch propeller would be an improvement.
No comments:
Post a Comment